
Overview
In Studio CMS, user accounts control who can enter the backoffice, which areas they can see, and which actions they can perform. This area is essential for organizing the project operation securely, ensuring different levels of autonomy across teams, and keeping control over data and permissions.
Where this area appears in Studio
Overview and list management
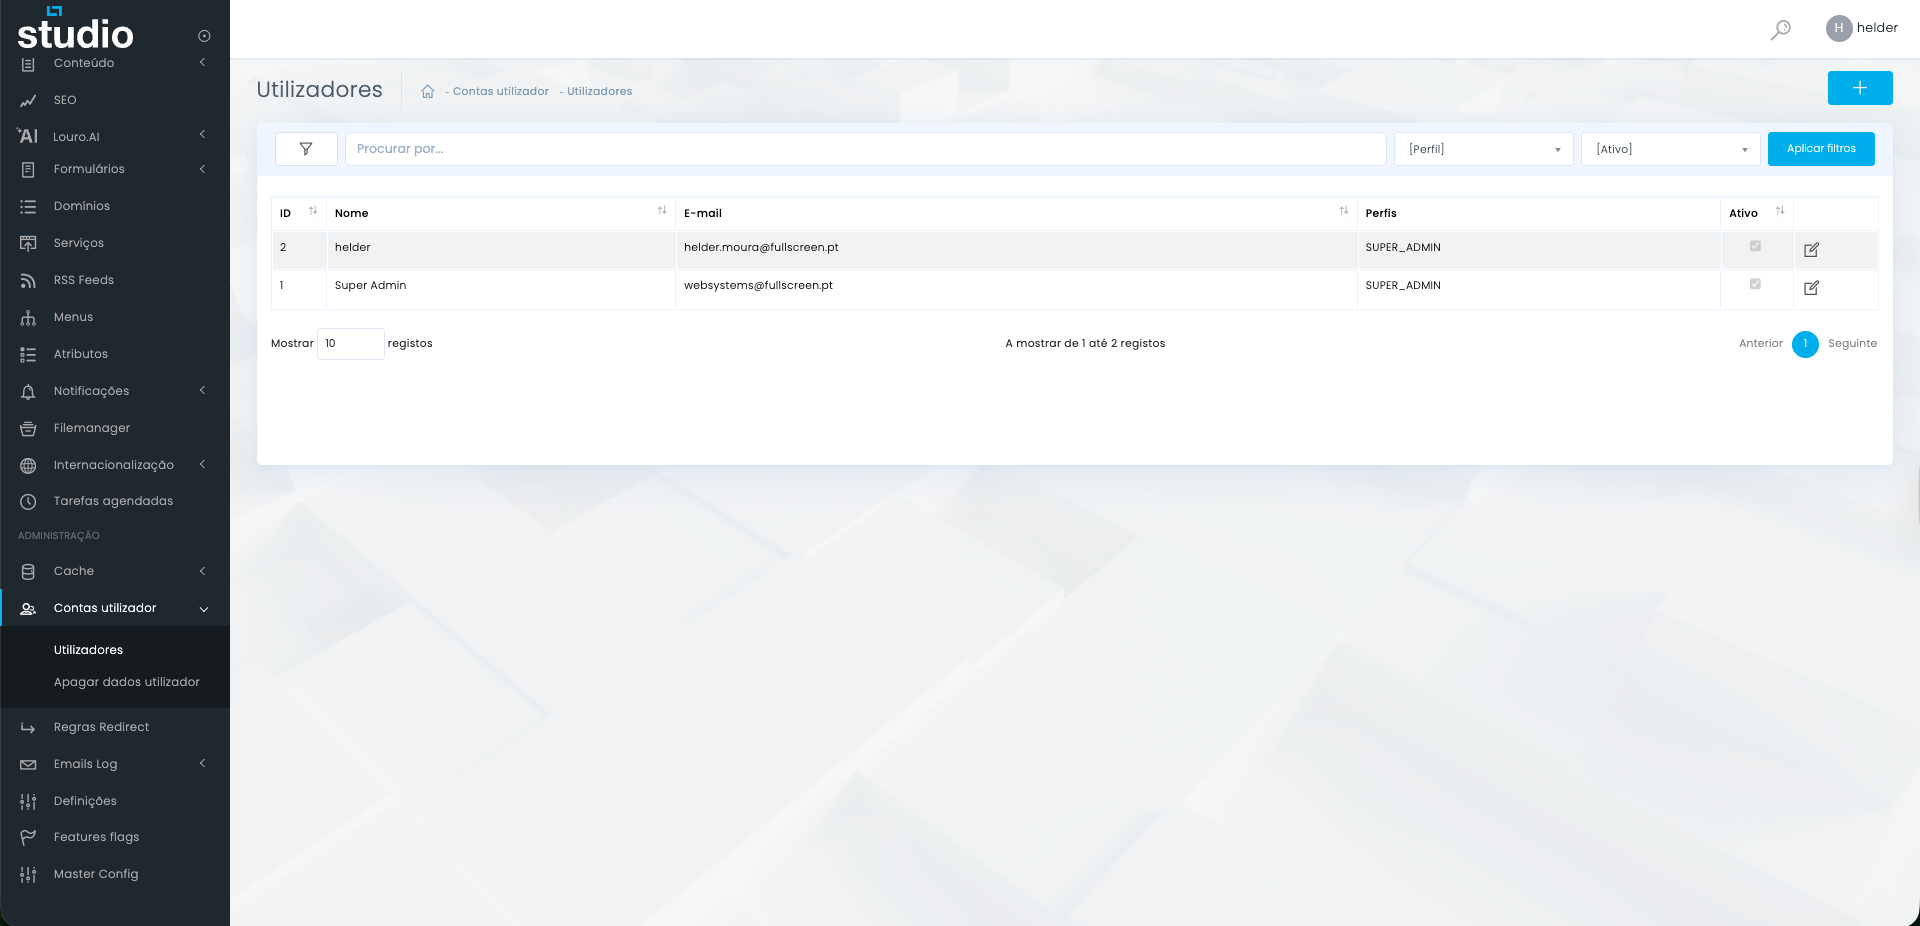
List
Lets you quickly understand who has access to the backoffice and which profile is assigned to them.
Filter and search
Help locate specific users when the project already has several active accounts or different teams operating in it.
Ações
The controls at the end allow you to open the existing account to review data, profiles, status, and other related settings.
Concept and what it is for
Controlled access to the backoffice
User account
It is the record that identifies a person in the backoffice and gives them access to the system through their own login.
Profile
It is the set of permissions assigned to the account and determines what the user can view, edit, or manage in the project.
Practical use
It is used to distribute responsibilities by team, control sensitive access, and avoid giving every user the same permission level.
How to create a new user
Main fields and base setup
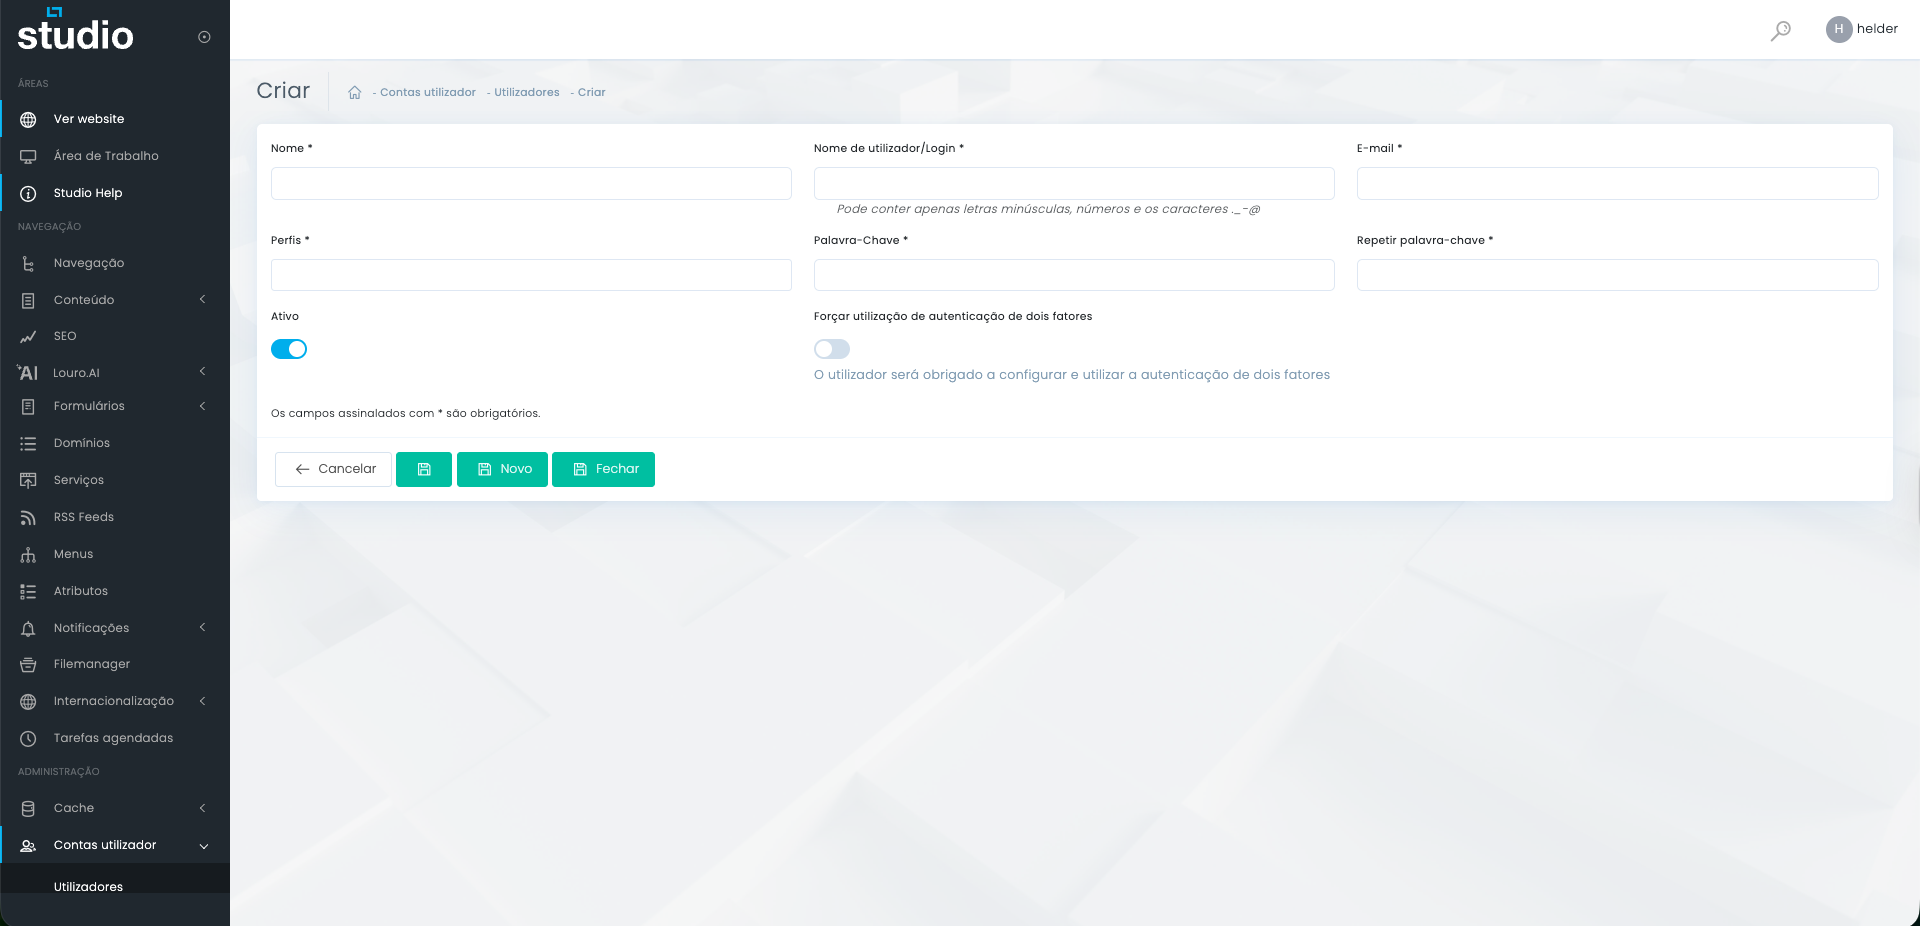
Identification
Name, login, and email define the account and help distinguish it from the others.
Security
The password, password confirmation, and the 2FA option help strengthen access to the system.
Status
The Active field lets you decide whether the new account becomes operational immediately or should remain inactive until final validation.
How to think about profiles and permissions
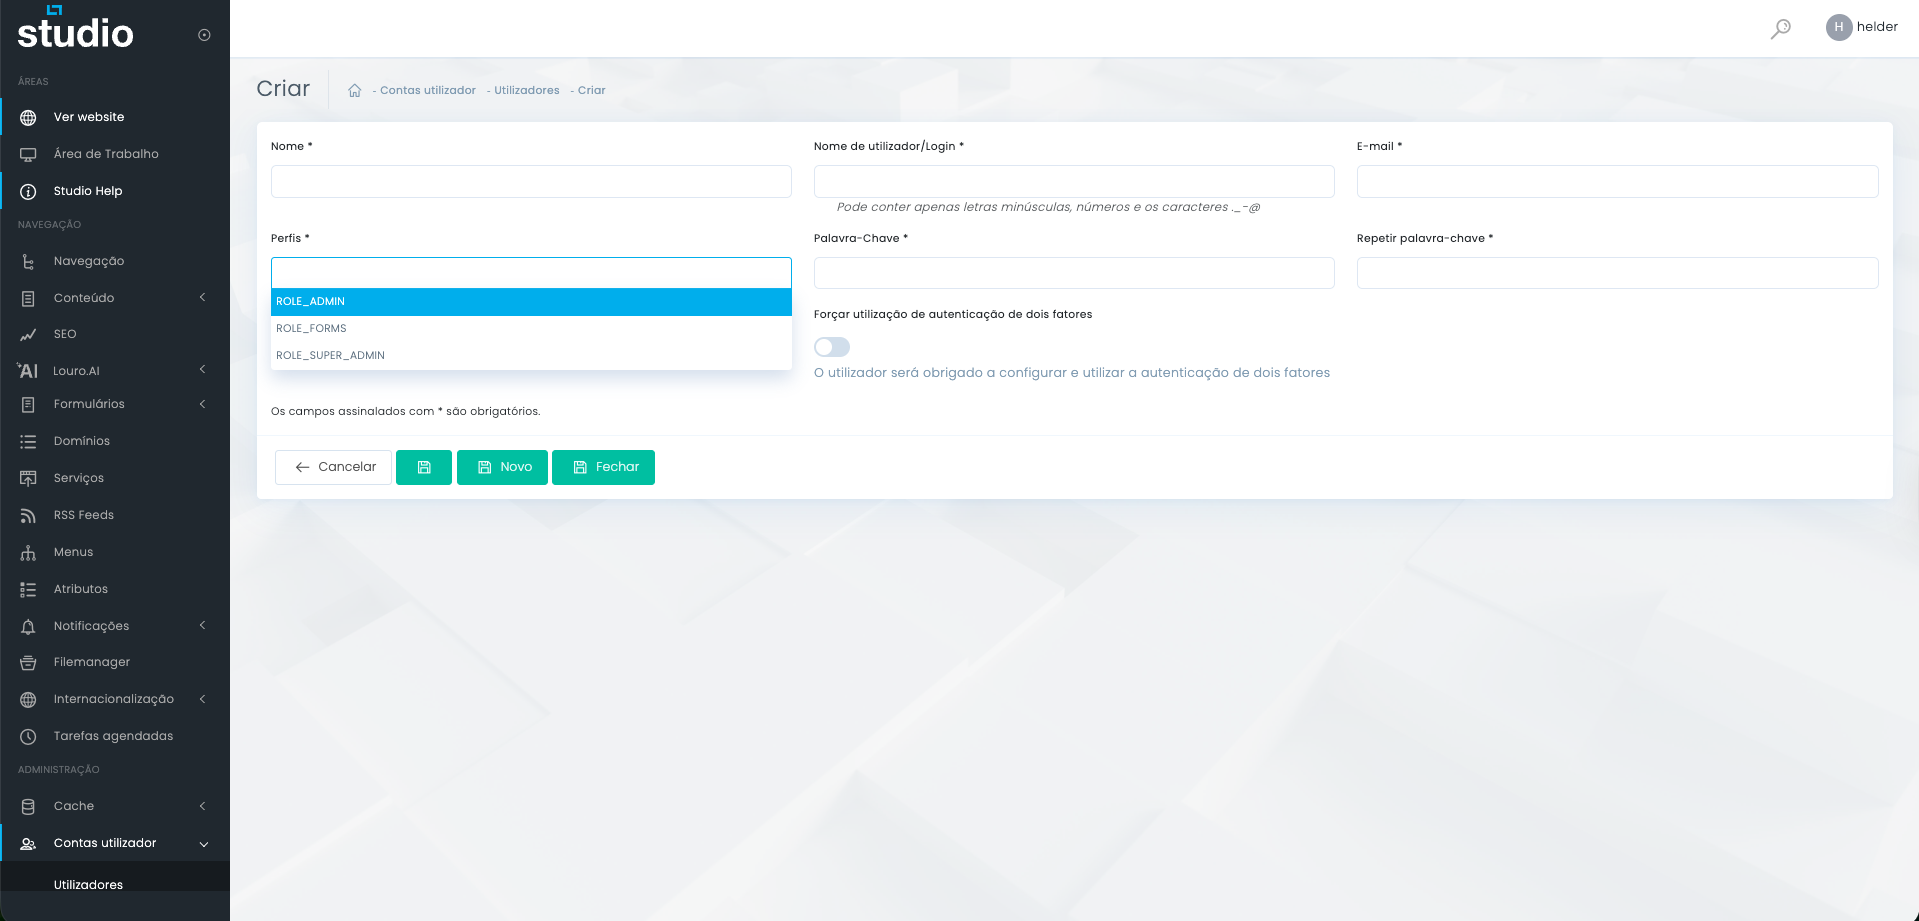
Profiles vary depending on the project
- Not all projects have exactly the same profiles. That depends on the enabled permissions and the functional architecture defined for the backoffice.
- Profiles such as ROLE_ADMIN, ROLE_FORMS, or ROLE_SUPER_ADMIN may exist as examples, but the final set can vary significantly.
- Ideally, each user should receive only the access necessary for their role, avoiding excessive permissions.
- If an account only needs to manage one specific area, the profile should reflect that limitation and not open full system access.
- When in doubt, it is better to confirm the project logic before creating the account than to rush and fix permissions afterwards.
Delete user data
Sensitive action on personal data
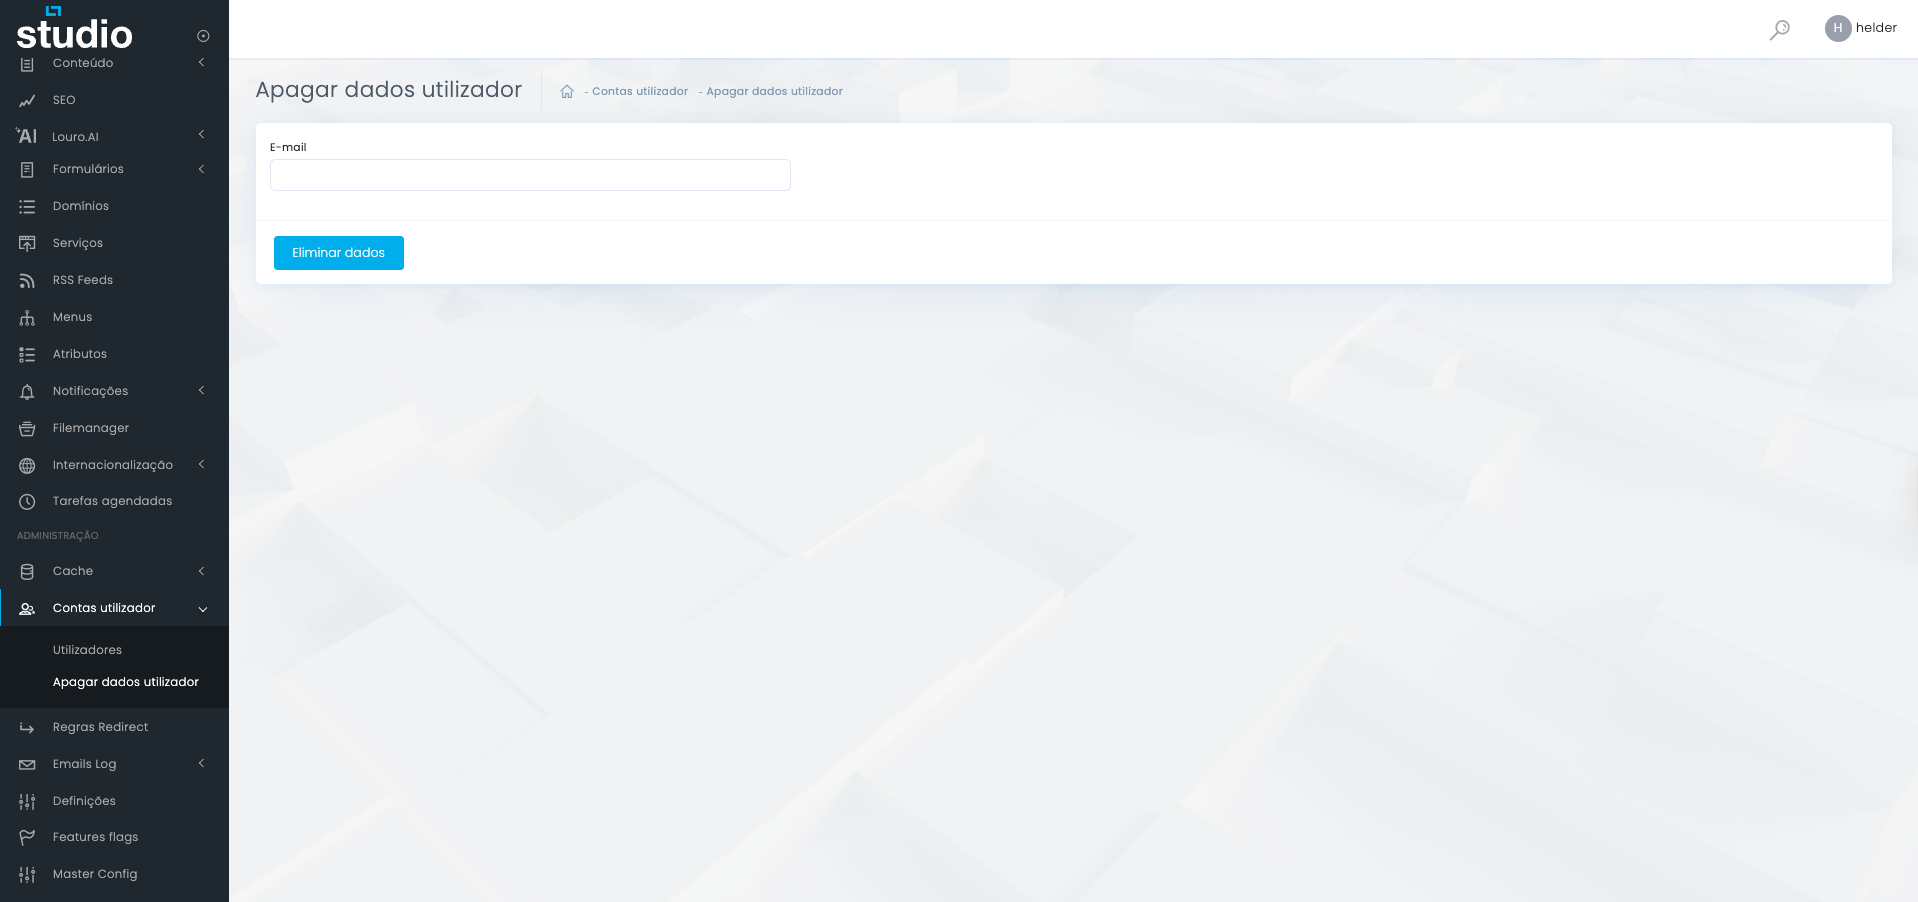
1. Confirm the correct email
The email field must match exactly the user to whom the action will be applied.
2. Validate the context
Before executing it, confirm internally why this action is necessary and whether it is aligned with the project procedure.
3. Execute with care
The Delete data button acts on personal information, so it should not be used as a casual account management routine.
Explore also
Related pages