
Overview
Creating an attribute means defining a reusable structure that can later power blocks and content with a controlled list of options. The process starts in the main form and continues into the values section, where each item is added individually.
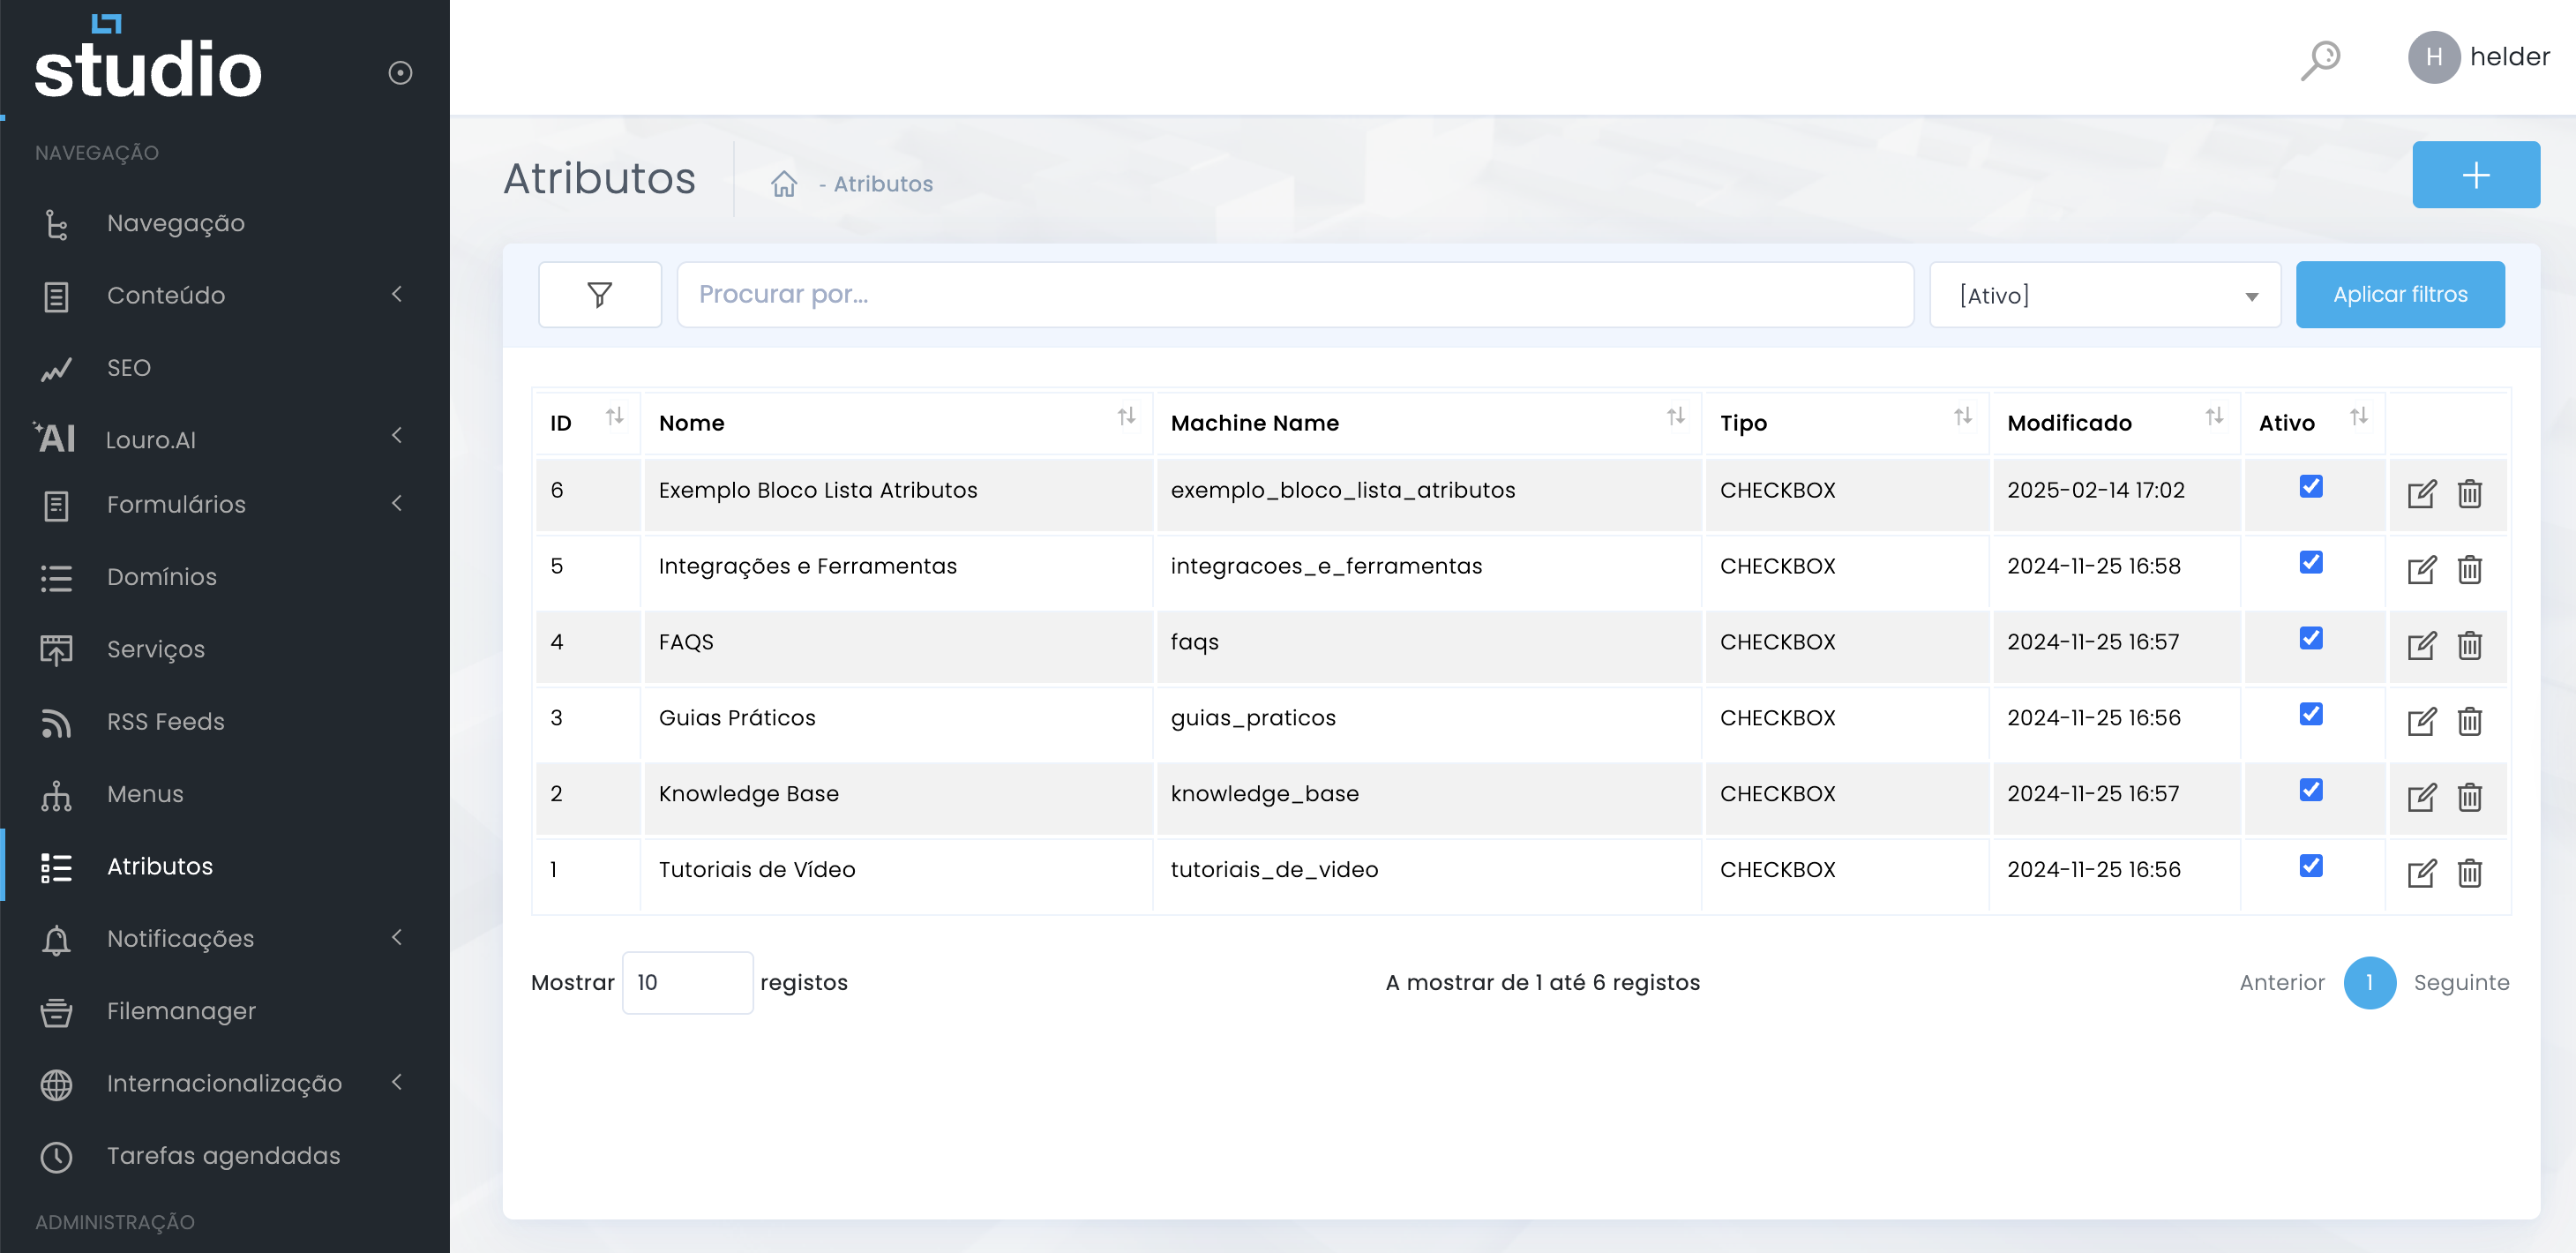
Where to start
Attributes → New
Fill in the attribute basics
Main form fields
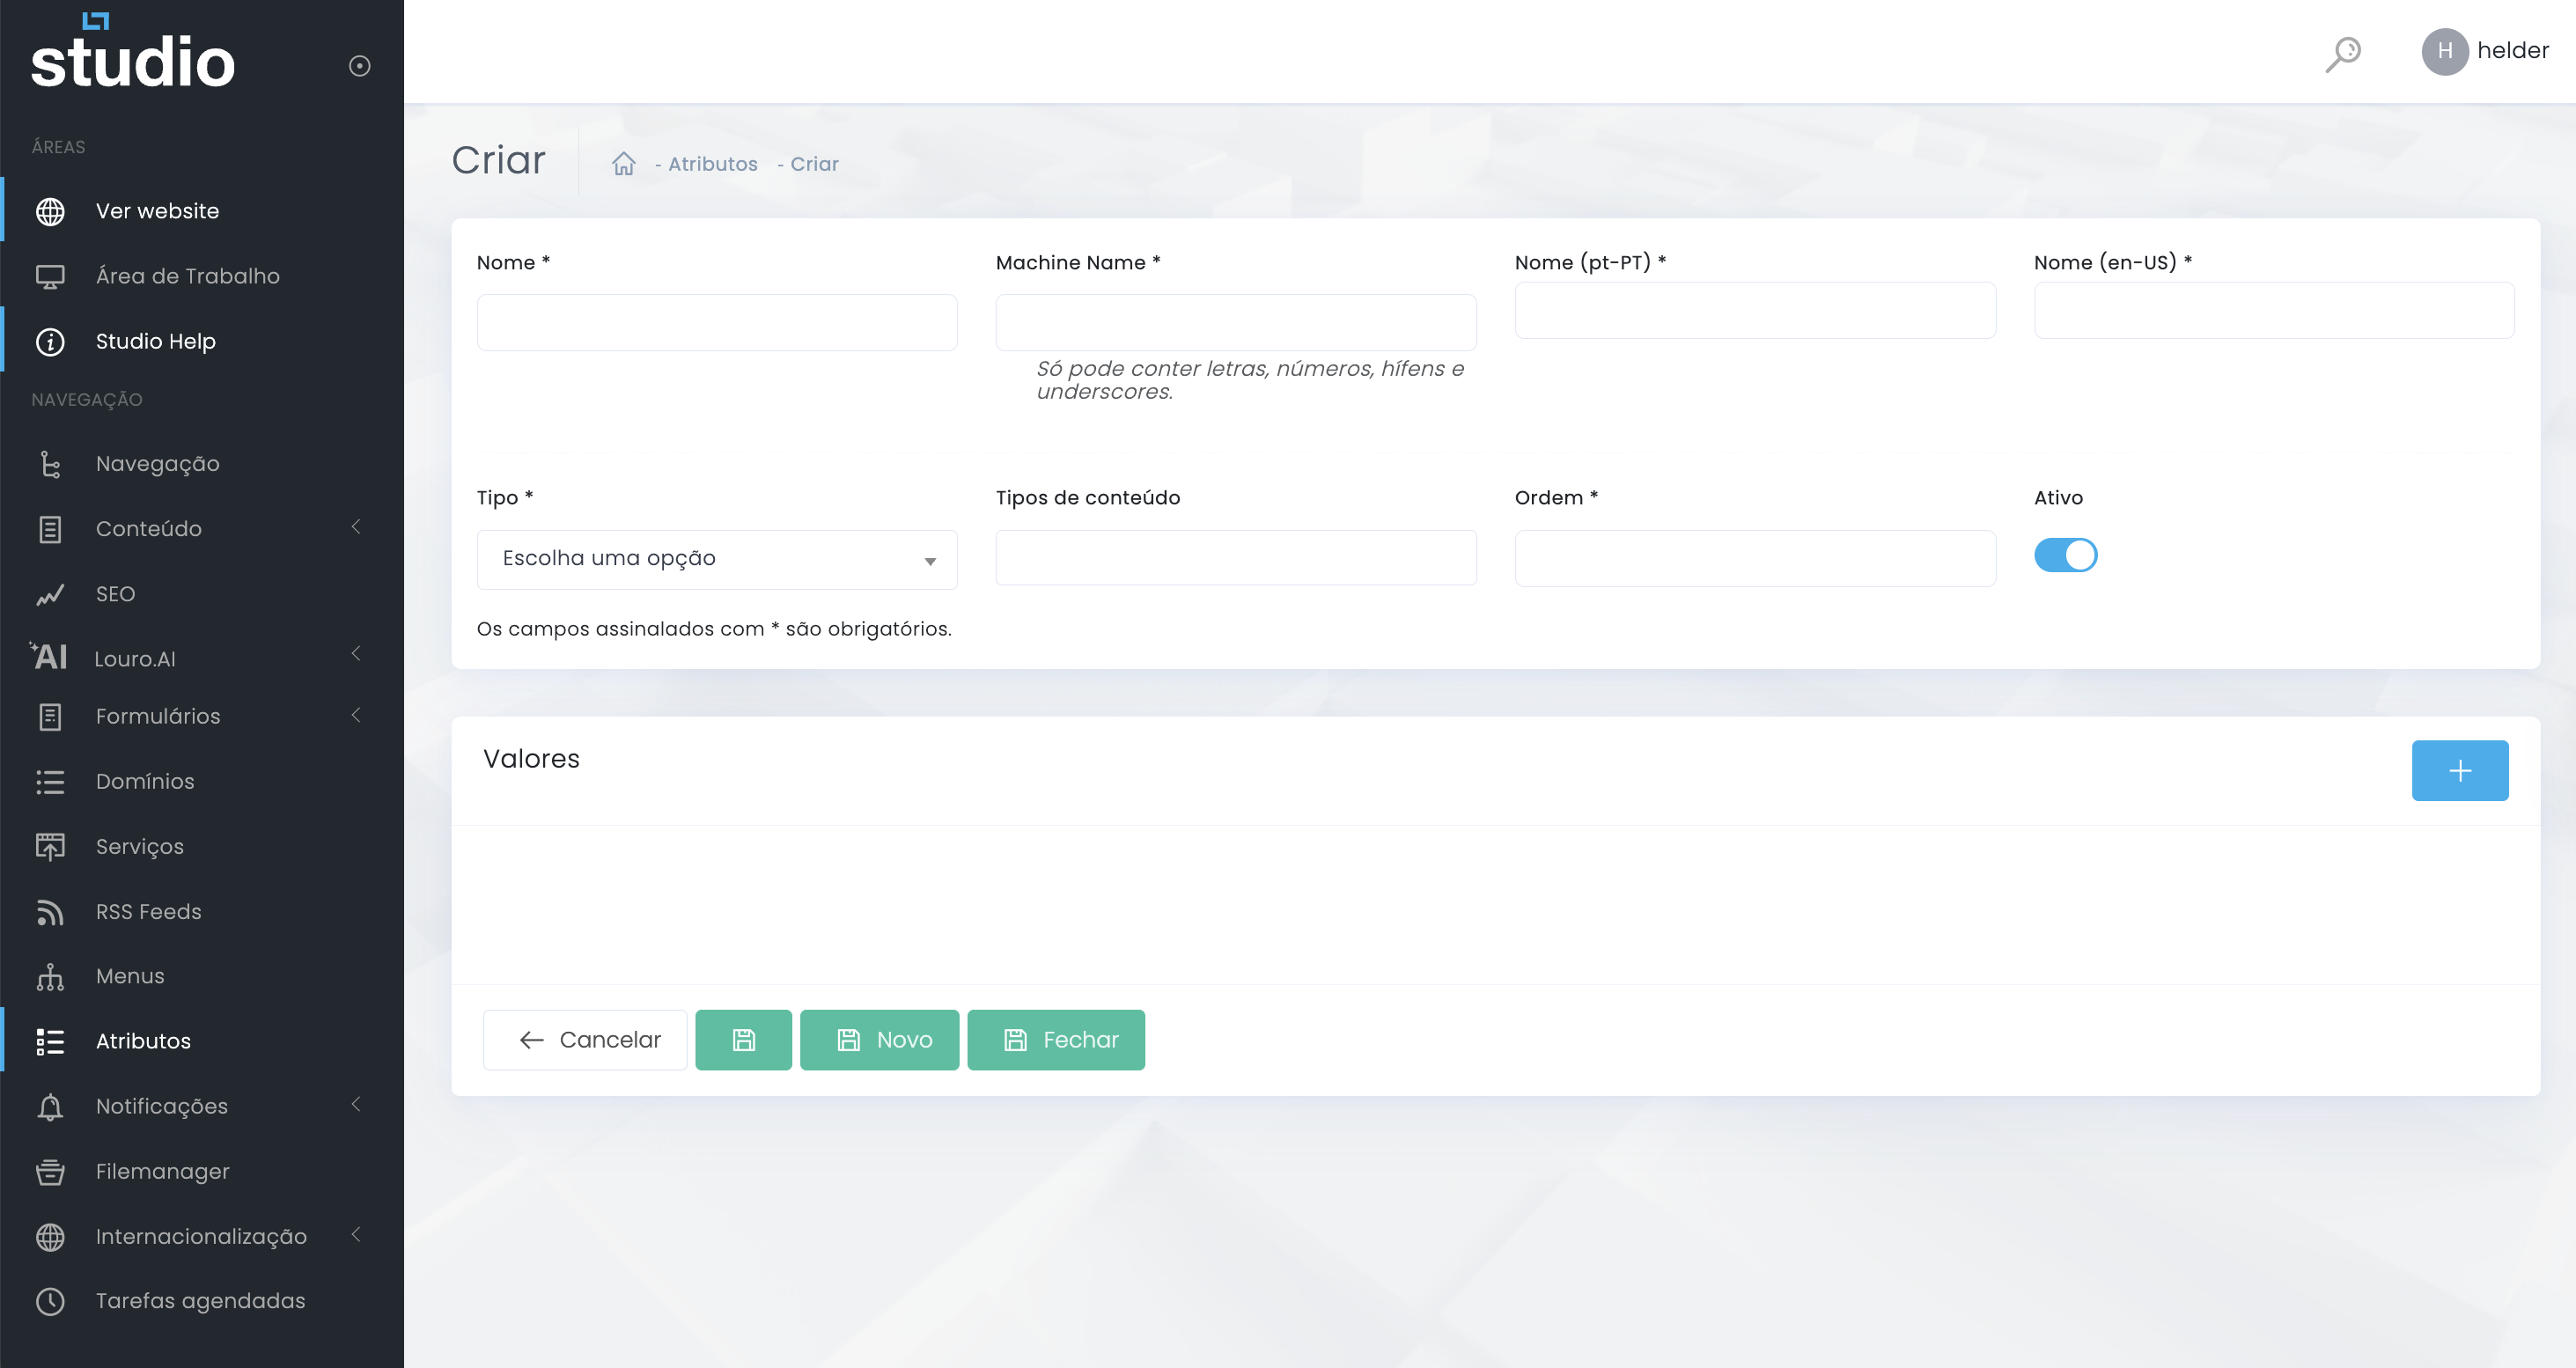
Required fields
- Name identifies the attribute internally.
- Machine name should be stable, technical, and without spaces.
- Name (pt-PT) and Name (en-US) support the multilingual reading of the attribute.
Support fields
- Order helps control the structure's position.
- Active defines whether the attribute is operational.
- The form notice indicates that fields marked with * are required.
Choose type and content types
Two fields that define behavior

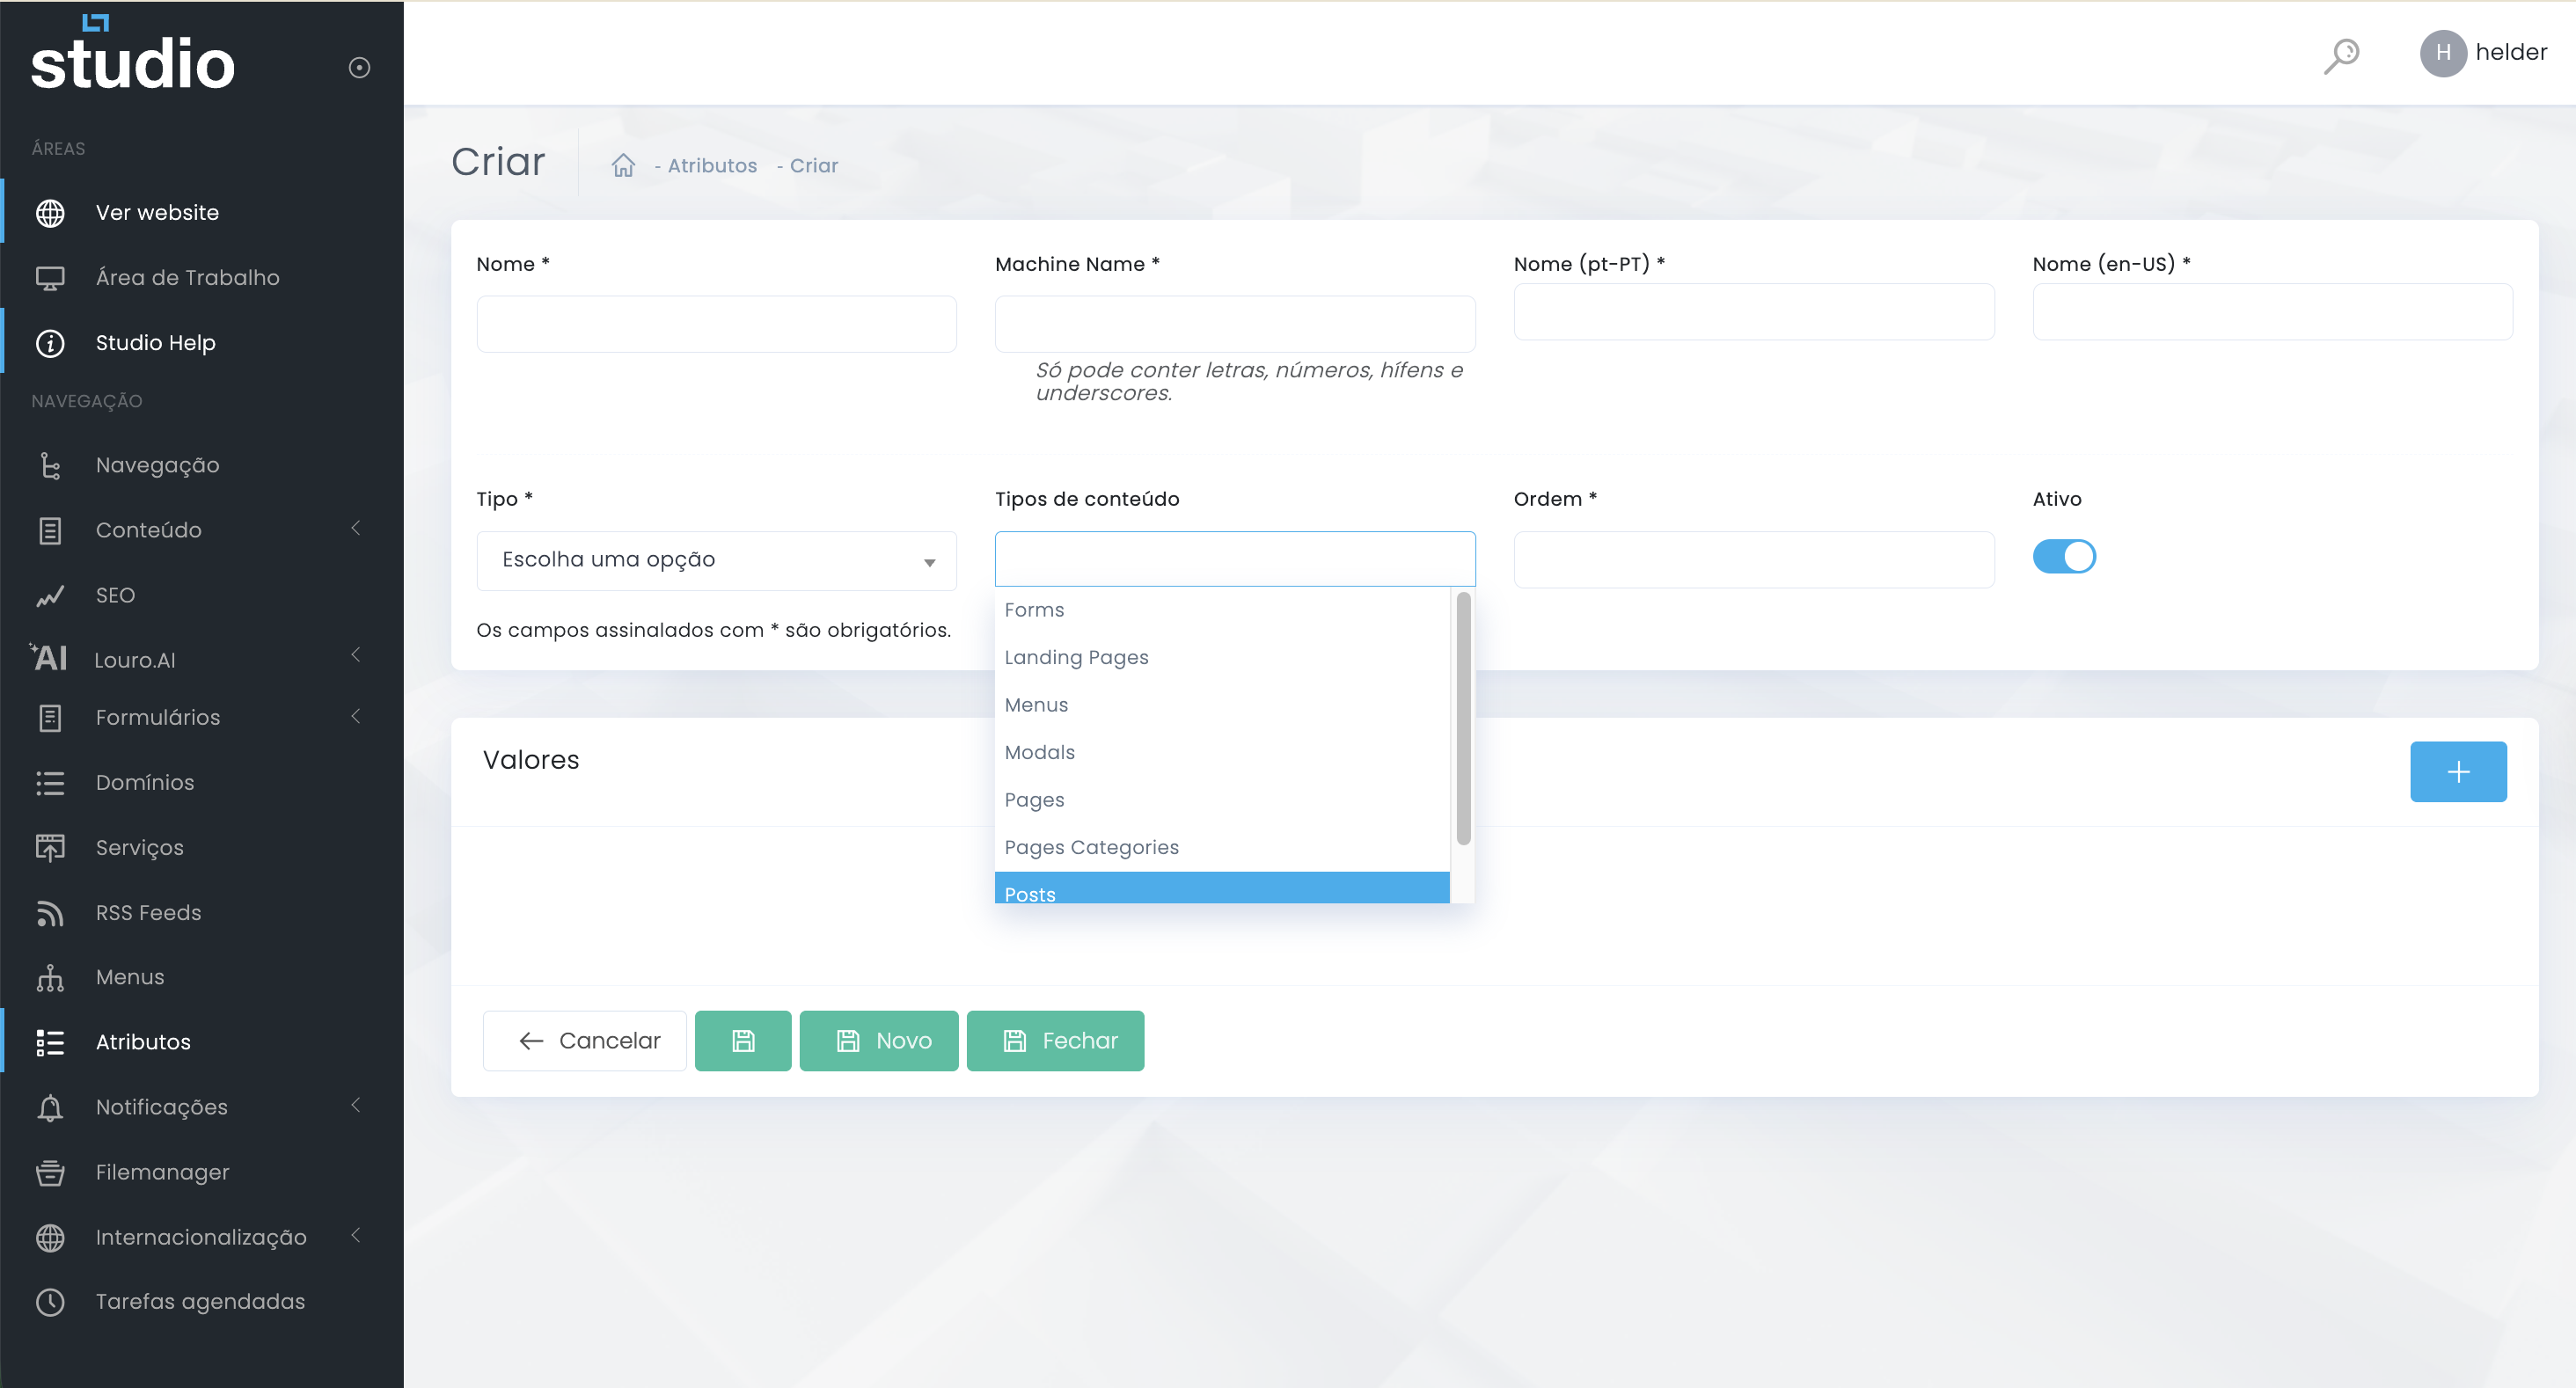
- Choose the type according to the experience the content will need.
- Link the attribute only to the content types where it genuinely makes sense.
- Avoid connecting the same attribute to too many areas if its function is highly specific.
Add values to the attribute
Internal list structure
1. Scroll down to the Values section
In the same form, the Values section is where each attribute item will be created individually.
2. Click the + button
The side + button opens a new space for adding a value to the structure.
3. Define the logic of each value
Each item should have a clear name, a consistent technical value, and, when relevant, supporting information for editorial or visual use.
4. Repeat for the remaining items
The process is repeated until the list is complete, organized, and ready to be used in the linked content.
What to validate before saving
Quick consistency checklist
- Confirm that the name and the machine name follow the same logic.
- Validate that the chosen type really matches the intended behavior.
- Check whether the linked content types are the right ones.
- Confirm that the structure is set to active only when it is ready to be used.
- Review the values list to ensure no essential items are missing.
Explore also
Related pages