
Overview
In Studio CMS, editing a translation happens in two moments: first finding the right entry in the global list, then opening the editor and reviewing the values for each language. The goal is to ensure the interface and content keep the same intention in every available language.
Find the right translation
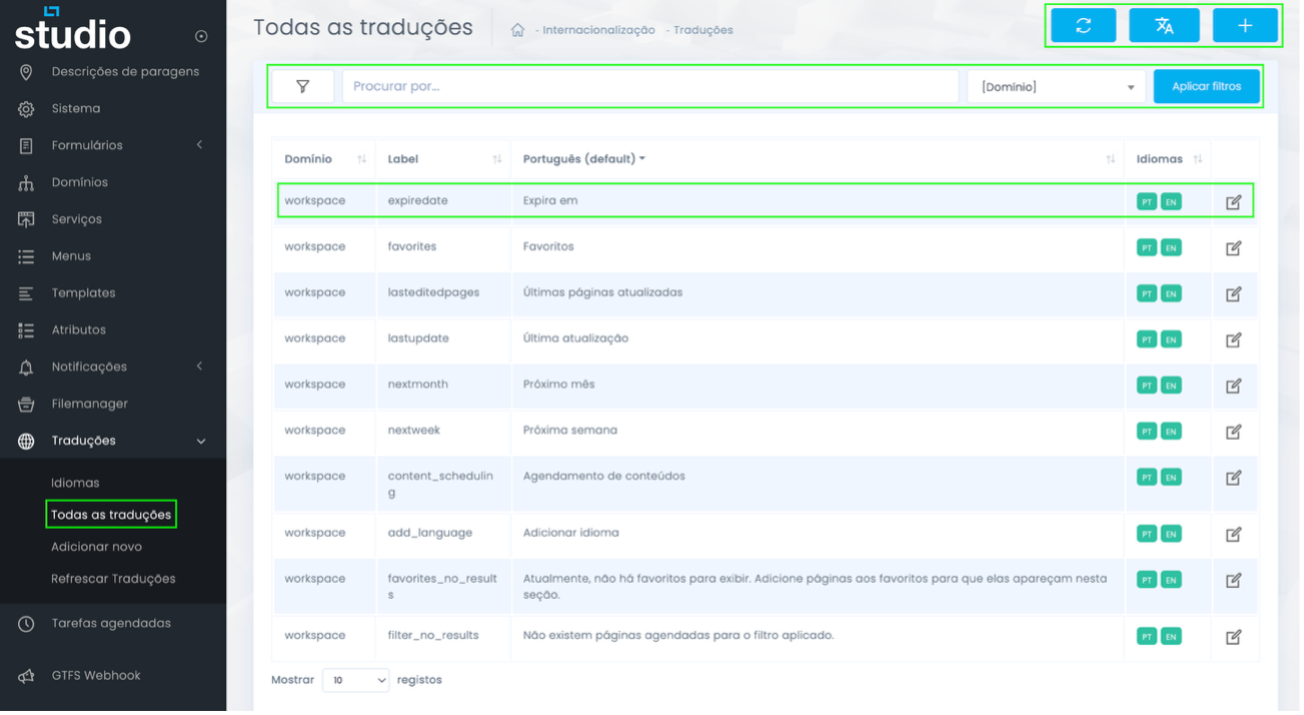
Global translation list
Edit values by language
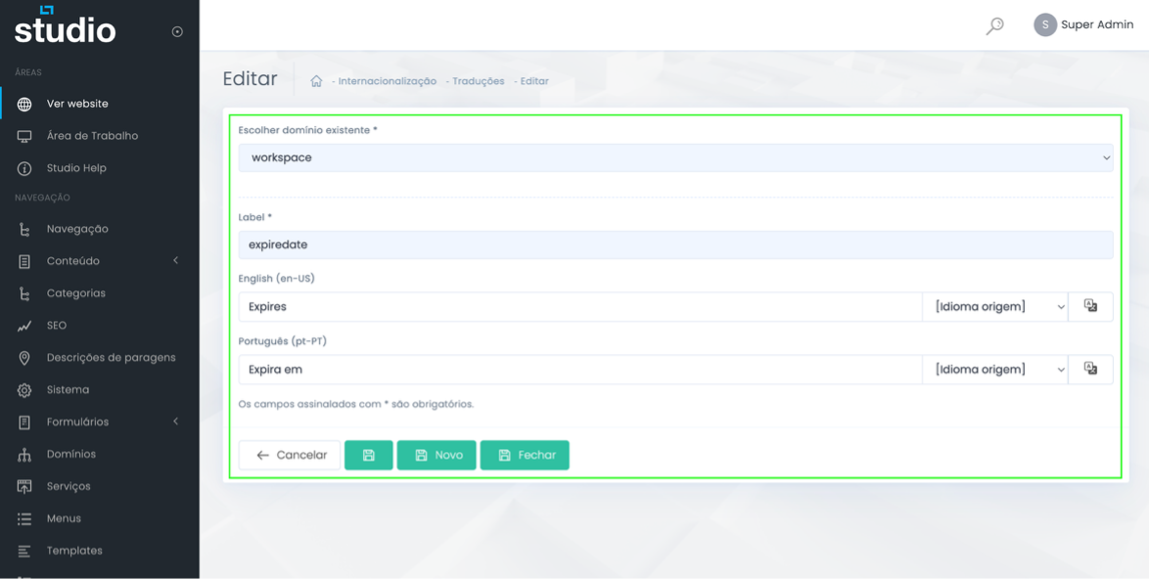
Edit form
Step by step
From search to final save
1. Open Translations
In the sidebar menu, open the Translations section and enter the global list to find the right entry.
2. Filter by domain or search by label
Use search and filters to reduce noise in the list, especially in projects with many system entries.
3. Open the edit action
After locating the correct row, use the edit icon to enter the detailed form for that translation.
4. Review domain and label
Before changing the text, confirm that you are really in the right domain and that the label matches the context you want to change.
5. Update the fields by language
Edit the values of each language and keep consistency in meaning, tone, length and message goal.
6. Save and validate in the real context
After saving, confirm where that translation appears in the backoffice or on the website to ensure the change is correct.
Editing best practices
How to avoid fragile translations
See the context
A short label may appear on a button, in an error message or in a summary. Translating without context increases the risk of ambiguity.
Keep consistency
If the project already uses a specific naming system, replicate it across similar entries so the interface does not become noisy.
Control length
Some languages expand more than others. It is worth validating whether the new text still fits inside the component.
Review with the language active
Whenever possible, test the change in the final language to catch cuts, alignment issues or mixed-language text.
Explore also
Related pages