
Overview
Filemanager is the backoffice area where the team organizes and reviews the files used across the project, such as images, PDFs, documents and other assets. Instead of uploading the same content repeatedly in different parts of the website, this area centralizes management and makes the workflow more consistent.
What Filemanager is
Concept and role within the project
Central library
It works as an organized repository for website files instead of scattering uploads across multiple backoffice areas.
Folder structure
It helps separate content by area, language, asset type or team, which makes maintenance faster and more predictable.
Base for reuse
It allows existing images and documents to be reused without duplicating assets or creating scattered versions of the same file.
What it is used for day to day
Practical value for editorial teams
- It allows new files to be uploaded for use in pages, blocks, modules and other website areas.
- It makes it easier to find existing assets through search, folder navigation and the main file list.
- It helps maintain a clear organization logic by section, client, language or content type.
- It prevents duplication because the team can understand more clearly what already exists before uploading again.
- It makes maintenance safer since files become easier to locate, review and replace.
How to read the Filemanager interface
Quick map of the main areas
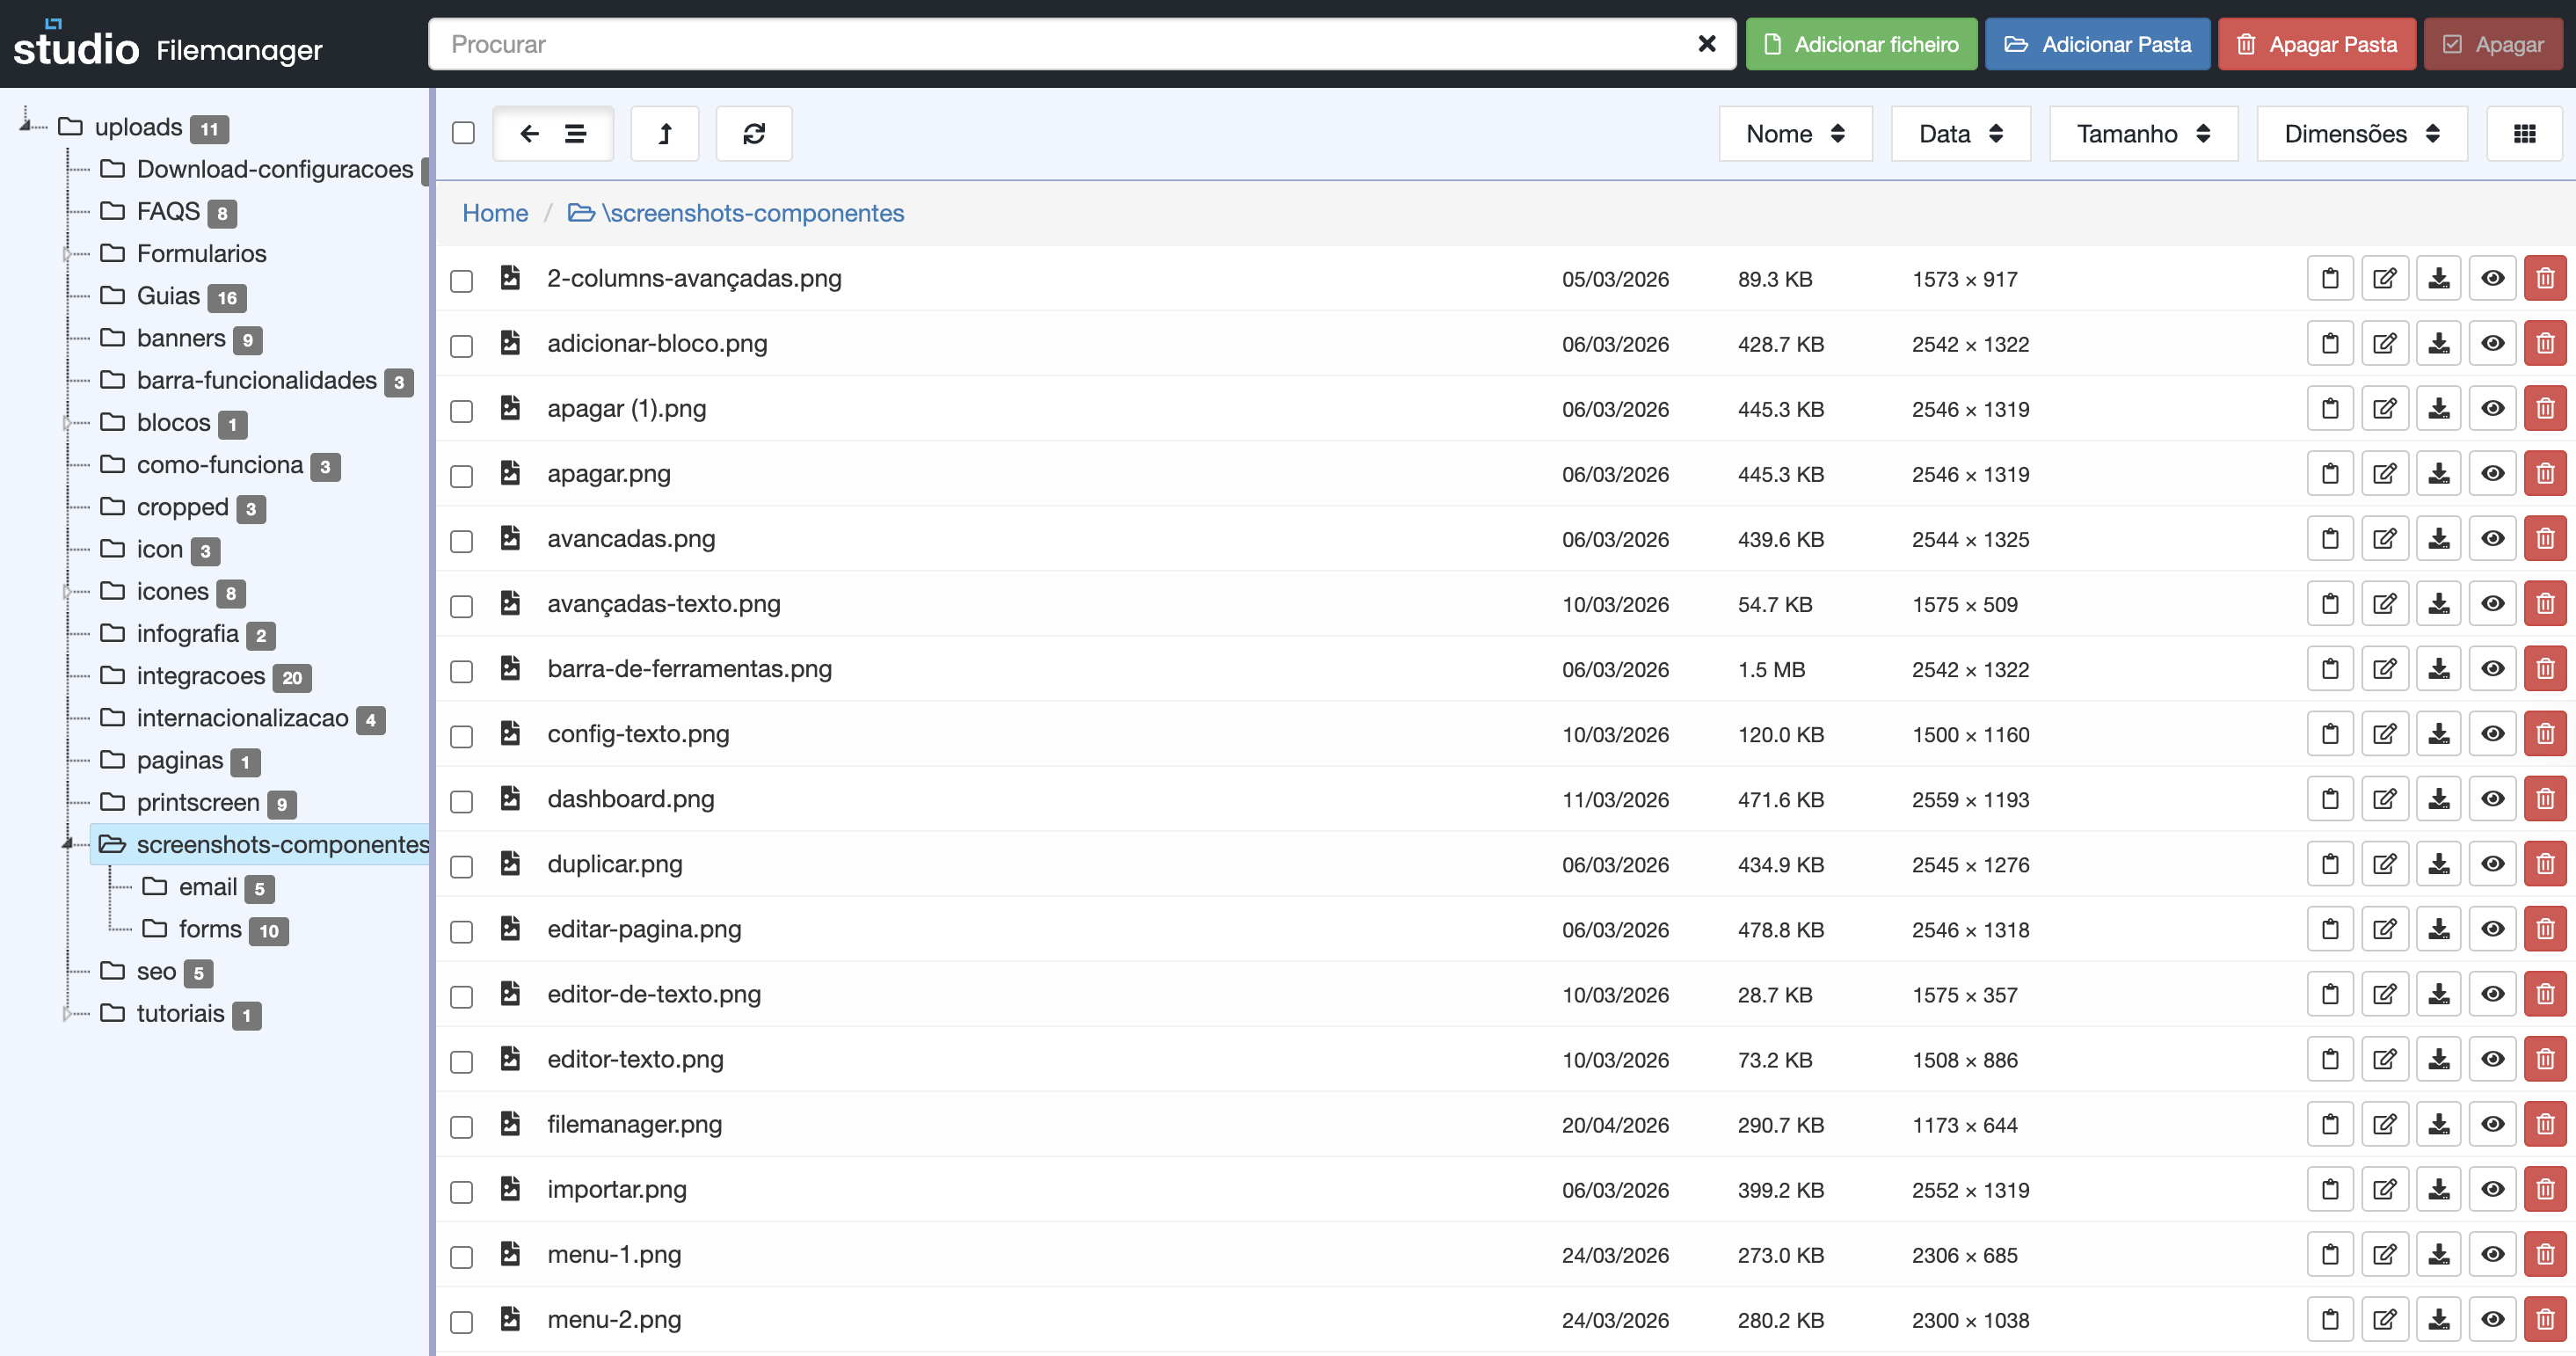
| Left column |
What the user sees
A tree of folders and subfolders that represents how files are organized inside the project.
How it should be used
Before searching or uploading a file, the user should choose the correct folder here to make sure they are working in the right context.
Why this area matters
This is the column that prevents images, documents or assets from being spread through Filemanager in a disorganized way.
|
|---|---|
| Search bar (top) |
What the user sees
A search field and, depending on the context, sorting options or filters to narrow down the results being shown.
How it should be used
It helps find a file name quickly, reduce visual noise in the listing and speed up the search when many assets already exist.
Why this area matters
It helps confirm whether an asset already exists before uploading it again, which reduces duplication and unnecessary versions.
|
| Main list |
What the user sees
The main listing of files inside the selected folder, usually with details such as name, date, size, format or dimensions.
How it should be used
This is where assets are compared, the correct file is validated and the user understands whether an image or document can already be reused in content.
Why this area matters
It gives enough context to make decisions without opening files one by one, making management faster and safer.
|
| Top buttons (right) |
What the user sees
Quick actions to create folders, add files or move forward with library-related management tasks.
How it should be used
After choosing the right folder, these buttons are used to start an upload or improve the structure of the area before saving new content.
Why this area matters
It centralizes management actions and helps maintain a logical flow: first locate the folder, then perform the right action.
|
| Actions per file |
What the user sees
Icons or actions beside each row to view, edit, download, move or remove a file, depending on the available permissions.
How it should be used
These actions are used once the correct asset has already been identified and the user needs to act directly on it without leaving the main listing.
Why this area matters
It avoids extra steps and makes Filemanager more operational because the user can act immediately on the intended file.
|
Best practices before uploading files
Small habits that prevent disorder
Target folder
Define first where the file should live. Good organization starts before the upload, not after it.
Clear naming
Use descriptive, simple and consistent names. This helps identify assets without opening them one by one.
Format and weight
Optimize images and choose formats that fit the real use case to avoid overly heavy files.
Avoid duplication
Search first. Very often the asset already exists and can simply be reused instead of creating another copy.
Most common usage flow
Quick reading of the process
1. Choose the right folder
Browse the left column and confirm the context before working with the files.
2. Search or validate what already exists
Use search and the main list to understand whether the asset is already available in the library.
3. Add or update the file
If needed, move forward with the upload or the corresponding action from the top buttons.
4. Review the basic data
Confirm the name, weight, date and dimensions to make sure the file is the correct one for the context.
5. Reuse it in content
Once well organized, the file is ready to be used in pages, blocks or other areas of the website.
Explore also
Topics related to assets and content