Help
Main structure of the documentation, with groups, subpages and expanded state.
Menu Component
The Menus area allows you to create, organize, and edit the project's navigation structures. Here, you can create menus, add new items, reorganize the hierarchy, and configure specific properties for each entry.
General information
The Menus module is used to build navigation structures in Studio CMS. It can be used for side menus, footer menus, section navigation, or other custom link structures.
In this section, the process is typically divided into three steps: creating the menu, adding items, and organizing the final structure. After that, you can edit each item in more detail, including the URL, link behavior, CSS classes, logo, and permissions.
How to create a menu
Initial setup
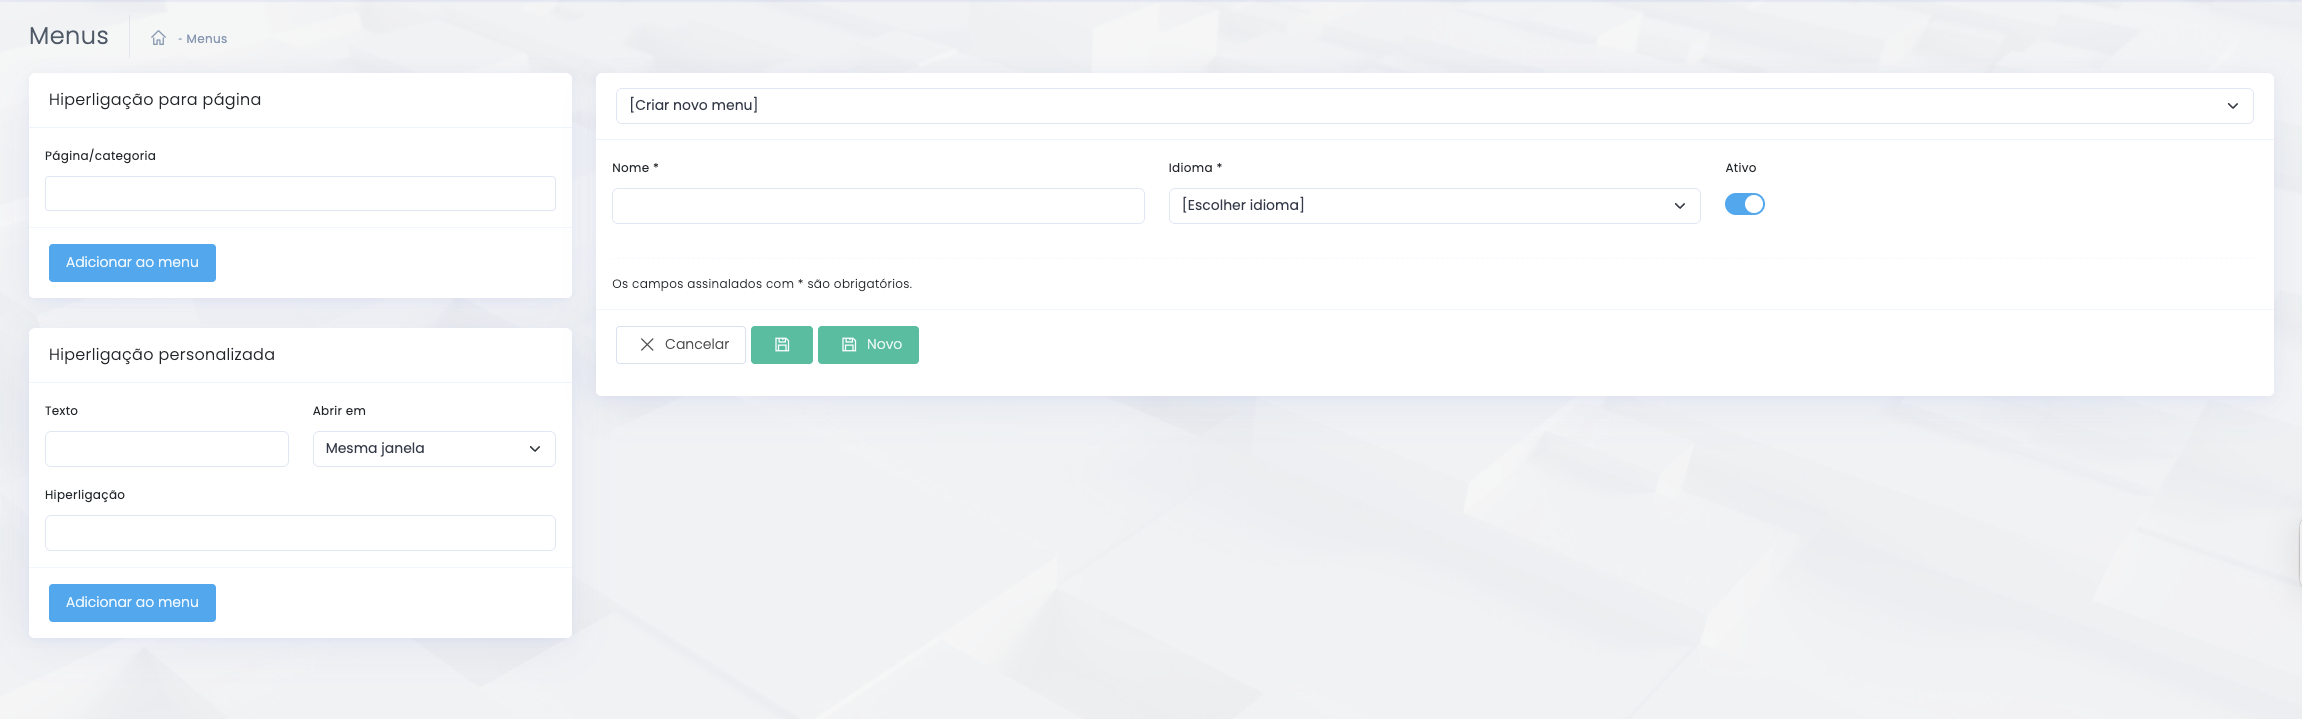
In the initial state, you can create a new menu, set its name, choose the language, and enable or disable the set.
Key steps
- Select or create a new menu
- Fill in the field Name
- Set up the Language
- Enable or disable the menu using the toggle Active
- Save the menu to start adding items
Useful notes
- It is best to use clear, internal names, especially when there are multiple versions per language
- Before organizing items, make sure the main menu has already been created correctly
How to add new items to the menu
Two forms of creation
Link to page
- Allows you to link an existing page or category to the menu
- This is the best option when the item should represent an actual page from the project
- After making your selection, simply click the Add to Menu button
Custom link
- Allows you to create manual items with Text, Hyperlink, and opening behavior
- It is useful for external links, anchor text, documents, or special pages
- It is also added using the Add to Menu button
How to organize the menu structure
Order, hierarchy, and submenu
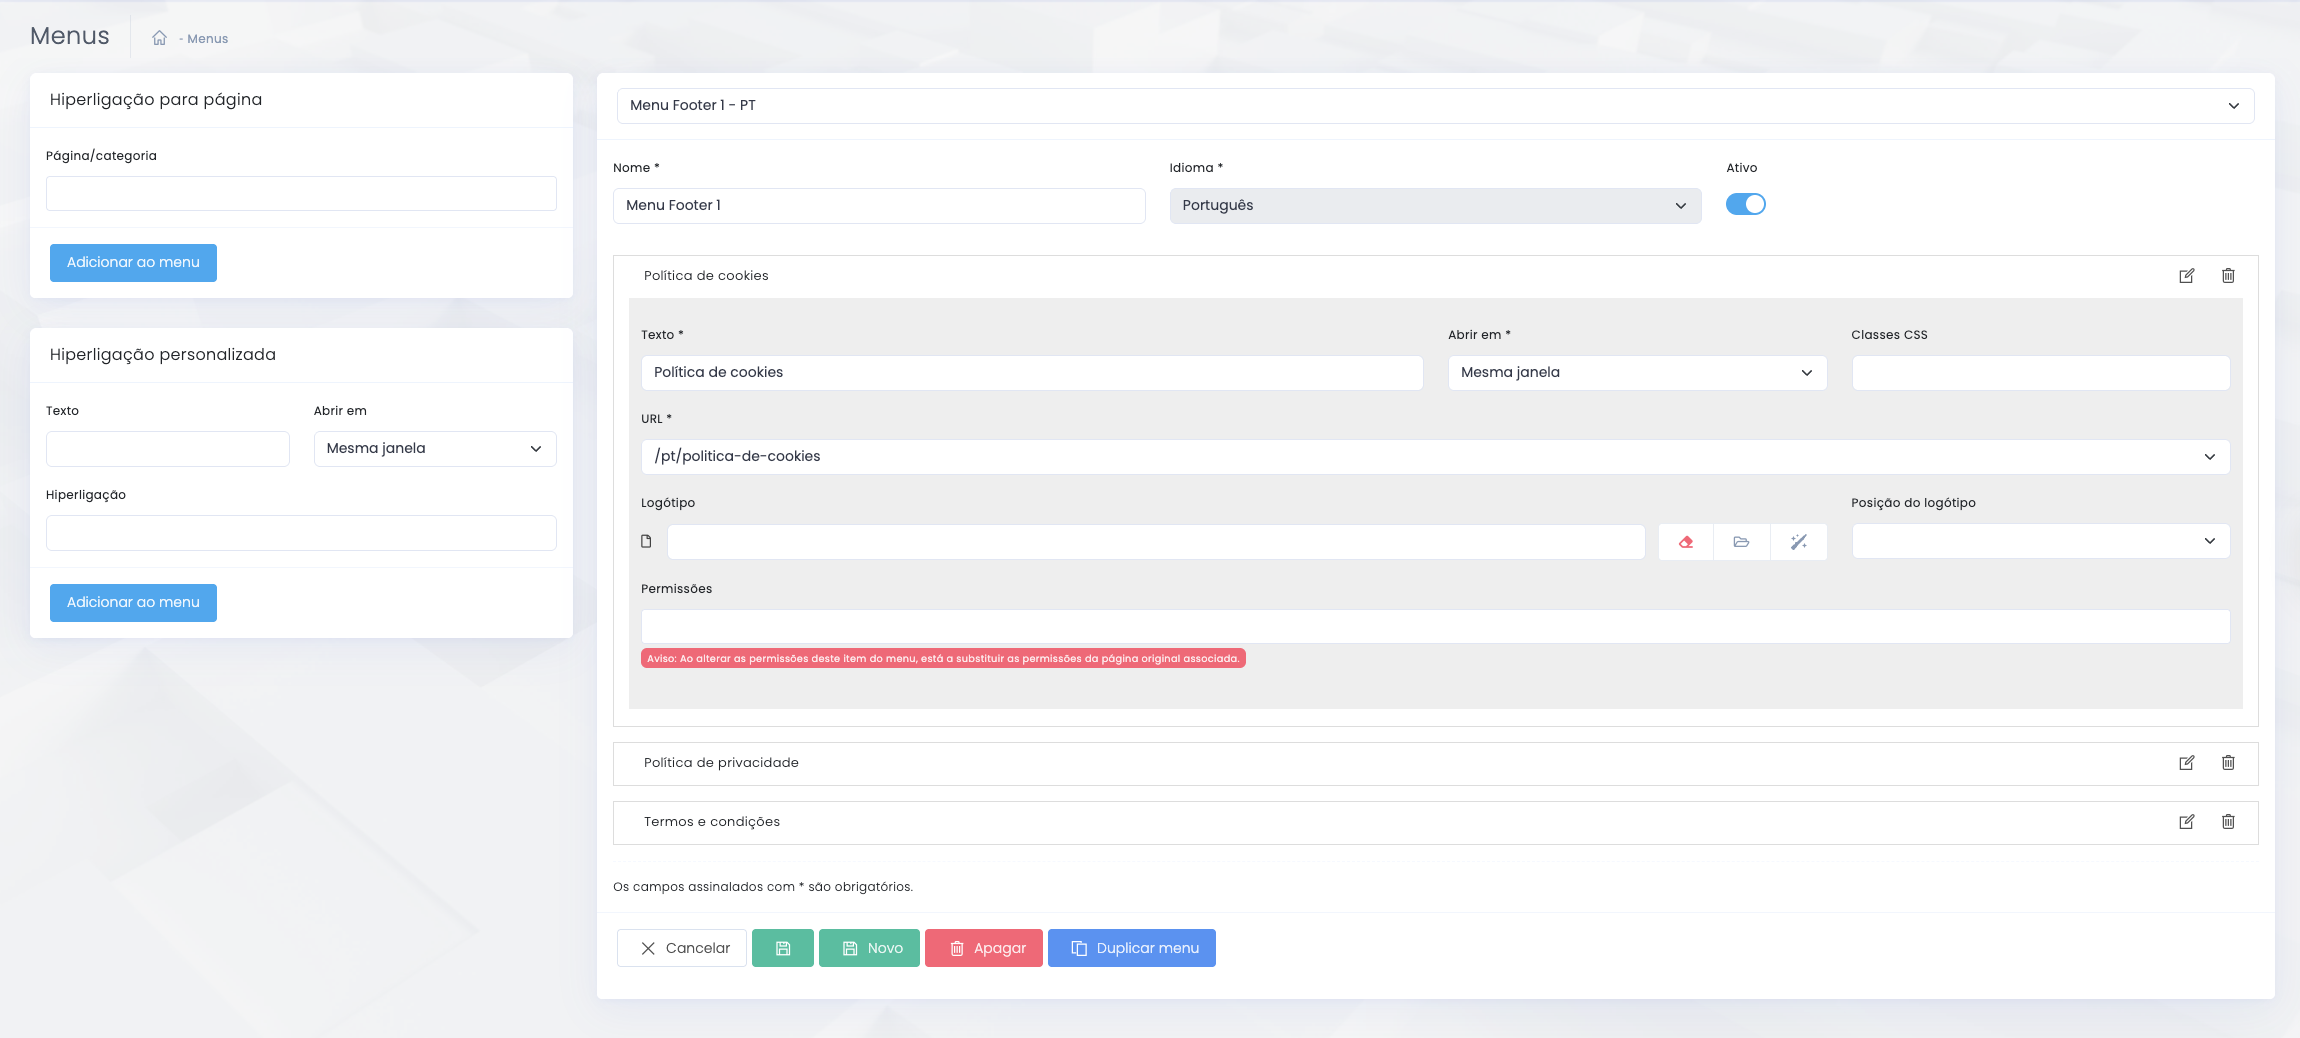
Once there are items in the menu, you can organize the structure and create hierarchical relationships between them.
Change position
- Items can be rearranged to change the final order of the menu
- The order directly affects the navigation displayed on the front end
Create submenu
- To create a submenu, drag an item onto another “parent” item
- This movement creates a hierarchical relationship between the two
- The inner item now functions as a subitem
Best practices for structure
- Avoid excessive depths
- Use submenus only when there is a clear relationship between items
- Always verify the final navigation after the reorganization
How to edit a menu item
Main fields
Base camps
- Text defines the item's display name
- Open in determines whether the link opens in the same window or in a new one
- URL specifies the destination of the item
When editing manually
- When the item text needs to be different from the page's original title
- When you need to correct or replace the URL
- When the opening behavior needs to be adjusted
More advanced settings within the menu
Additional fields per item
CSS classes
- Allows you to add specific classes to the item
- It should only be used when the team has established a convention
- It's useful for very specific styling needs
Logo and placement
- Some items may have an logo associated with them
- You can also set the logo position
- This feature should be used when there is a genuine visual need for it in the menu
Permissions
- Items may have permissions associated with them
- When changing permissions, you may be overwriting the settings inherited from the original page
- It must be carefully validated
Best practices
Clarity and maintenance
Clear navigation
- Use short, clear names
- Avoid menus that are too long without grouping
- Create submenus only when the relationship between items is clear
Future maintenance
- Review your custom links regularly
- Avoid overly deep structures
- Test the menu on the front end after any reorganization
- Ensures consistency across languages and versions of the same menu